Fix Your Video Interview Lighting in Under Five Minutes
Fix Your Video Interview Lighting in Under Five Minutes
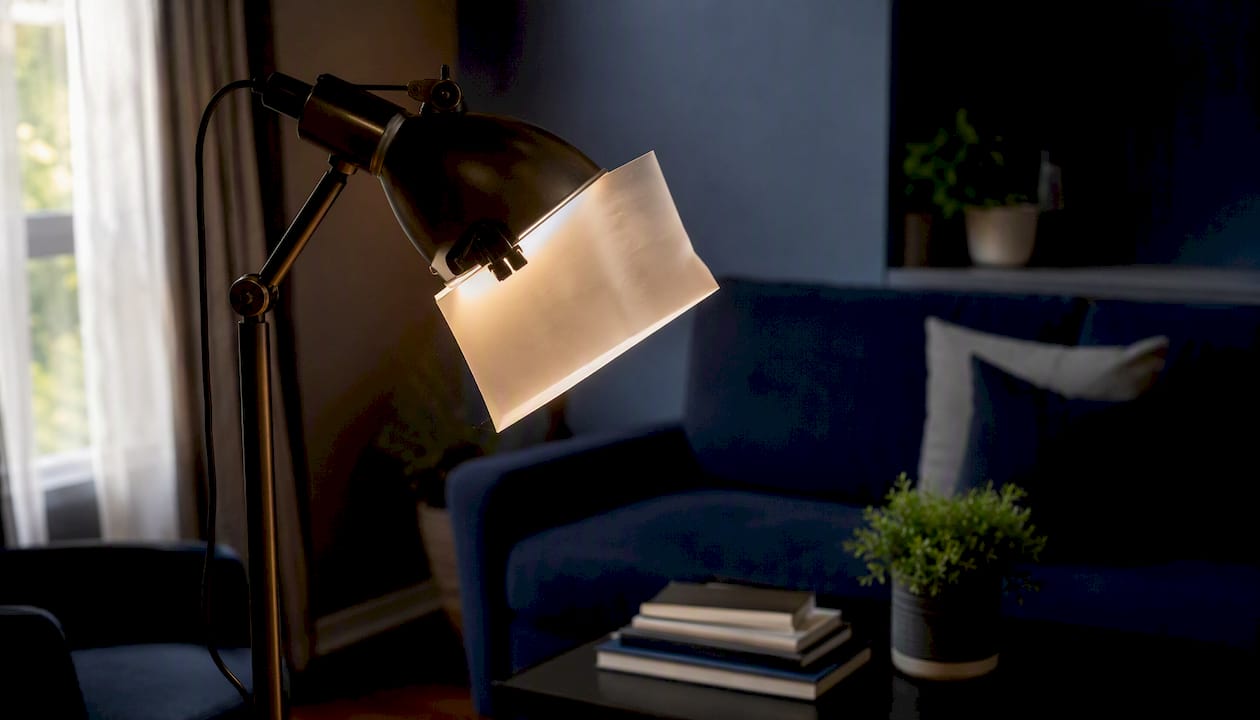
Turn your face toward a window or lamp, not away from it, and raise your webcam to eye level. That single move fixes the two most common problems on a video call: a shadowed face and an unflattering upward angle. If you have no window nearby, an inexpensive ring light or a pair of desk lamps at eye level does the same job. Everything else is fine-tuning.
TL;DR:
- Elevate your webcam to eye level using books or a stand to improve confidence and avoid unflattering angles during video calls.
- Use natural light from a window in front of you or bounce a lamp off a wall to achieve soft and even illumination at minimal cost.
- Add a second, dimmer light at a 45 degree angle to soften shadows and reduce glare on glasses for a more professional appearance.
- Test and adjust your lighting setup during the same time of day as your interview, checking exposure, color, shadows, and reflections beforehand.
- Keep your background simple and avoid bright windows or overhead lights that cast shadows or cause color temperature mismatches.
Table of Contents
- What Is the Foundation of Good Video Interview Lighting?
- Three Cheap Lighting Setups You Can Build Right Now
- How Do You Set Up Two-Point Lighting Without Overdoing It?
- How Do You Test and Fix Your Setup Before the Real Call?
- Your 10-Minute Pre-Interview Lighting Checklist
- Why Overhead Lights and Mixed Bulbs Wreck Your Video Interview
- How Do You Adjust White Balance for Accurate Skin Tones?
- Don’t Let Your Background Undo Good Face Lighting
- Adjusting Your Setup for Different Rooms and Wall Colors
- Softening Harsh Light With a Diffuser or Softbox
- Iteration’s Perspective: Lighting Is a Delivery Signal, Not Just a Look
- Test Your New Lighting Setup With a Real Practice Round
- Sources
What Is the Foundation of Good Video Interview Lighting?
Before you touch a single bulb, get the mechanics right. Camera position and framing matter as much as the light itself, and most people skip straight past both.
Start with your webcam height. A laptop camera sitting on a table shoots up your nostrils and puts your face in shadow from the chin up. Stack a few books, a box, or a laptop stand until the lens sits at eye level, or slightly above it. Raising the camera to eye level makes you read as more confident and engaged on screen, which is exactly the impression you want walking into a hiring manager’s inbox.
Framing comes next. Show your head and the top of your shoulders, with a little space above your head so you’re not crammed against the top of the frame. A tight crop on your chin feels claustrophobic to the person watching; too much empty space above your head makes you look small and distant.
Then there’s the rule that trips up almost everyone: light has to come from in front of you, not behind. Sit with a bright window or lamp behind your back and your webcam’s exposure will lock onto that bright spot, dropping your face into a dark silhouette. Sitting with bright light behind you causes exactly this problem, and no amount of camera settings will fully undo it. Close blinds behind you, or turn your desk so the window faces you instead.
One more fundamental: stick to one type of light source if you can. Mixing a warm lamp bulb with cool daylight from a window splits your face into two different color casts, one side orange and one side blue.
- Camera at eye level, using books, a box, or a stand
- Head and shoulders in frame, with breathing room above your head
- Light source in front of you, never behind
- One consistent bulb type or light source where possible
Pro Tip: If your laptop has no adjustable stand, a stack of hardcover books works just as well as a $40 riser, and nobody sees it on camera.
Three Cheap Lighting Setups You Can Build Right Now
You don’t need studio gear. You need one of three setups, and all three cost close to nothing.
1. The window-first setup. Move your chair or desk so a window sits directly in front of you, not to the side and definitely not behind. Sheer curtains or a thin white sheet over the glass turn harsh midday sun into soft, even light across your face. Using natural light from a window in front of you is the fastest, cheapest fix available, and it costs you nothing. The catch is timing: this setup only works if the interview happens during daylight hours.
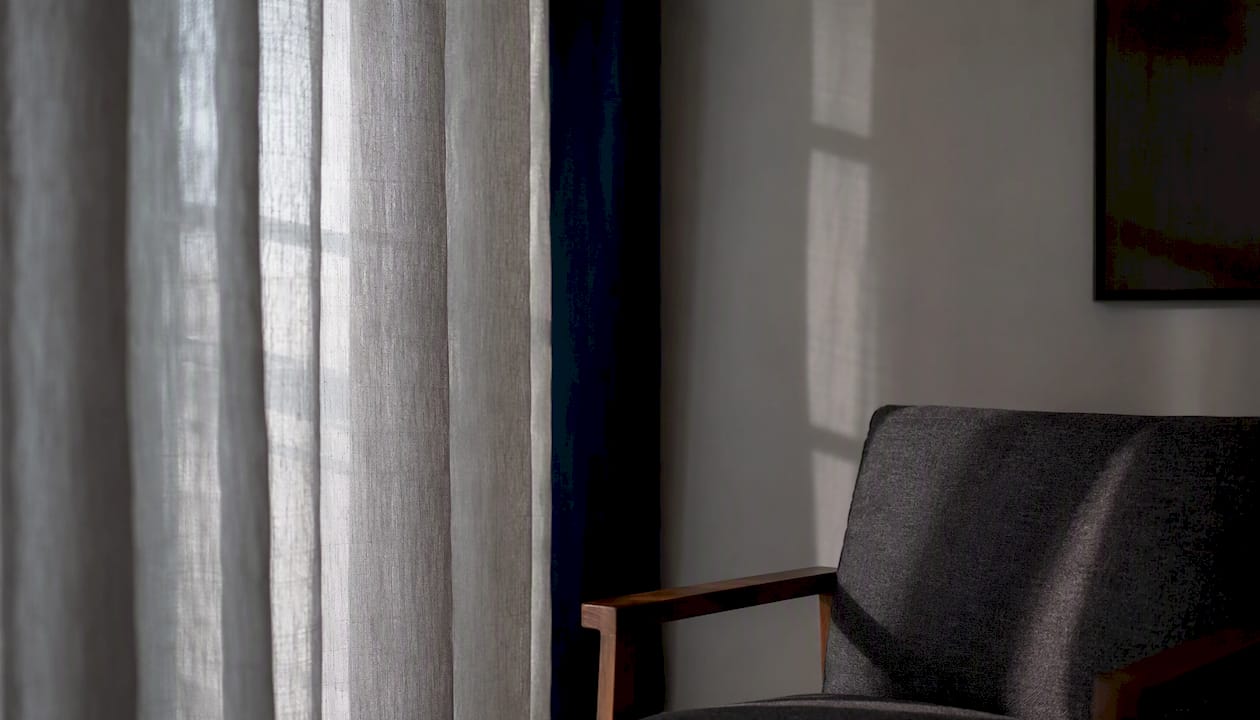
2. The lamp-bounce technique. No good window, or your interview is at 7 p.m.? Grab a regular desk lamp and point it at a nearby white wall instead of directly at your face. The wall scatters the light and bounces it back onto you as a soft, diffused glow instead of a harsh spotlight. This trick borrows directly from how photographers avoid pointing bare bulbs straight at a subject, and it works with any lamp you already own.
3. The ring light or two-lamp setup. A small USB ring light clipped to your monitor, positioned at eye level and centered on your face, gives even, flattering light with zero setup time. A $15 ring light can make a noticeable difference in how clear and polished you look on camera, and most models run well under $50. Don’t have a ring light? Two ordinary desk lamps, one on each side of your screen at eye level, do almost the same job.
- Window-first: face the light, diffuse it, test it at the right time of day
- Lamp-bounce: aim the lamp at a wall, not at your face
- Ring light: mount at eye level, centered, angled slightly down
How Do You Set Up Two-Point Lighting Without Overdoing It?
A single light source works fine, but adding a second light gives your face more depth and softens the flat, washed-out look a lone lamp can produce. This is the smallest upgrade worth making if your webcam interview really matters.
The setup is simple. Put your main light, the key, at roughly a 45 degree angle from your face and slightly above eye level. Then place a second light, the fill, on the opposite side, dimmer than the key, ideally around about half the intensity of the key light. The fill’s job isn’t to light your face on its own. It just softens the shadow the key light creates on the opposite side of your nose and cheek.
Glasses wearers deal with a separate headache: reflections that turn your eyes into two white glares. A few adjustments usually solve it.
- Raise the light slightly higher than eye level and angle it down, rather than aiming it straight at your lenses
- Move the light a few inches left or right until the reflection disappears from camera view
- Mount a ring light on a small stand instead of clipping it to your monitor, since a stand gives you more angle options to dodge glare than a fixed clip does
- Dim the lamp, move it farther back, or bounce it off a wall if the reflection still won’t budge
Pro Tip: Put on your glasses and slowly tilt your head up and down while watching the webcam preview. You’ll see exactly where the glare disappears, and that’s the head position to remember for the real call.
How Do You Test and Fix Your Setup Before the Real Call?
Run a five minute test call at the exact time of day your interview is scheduled, on the same Wi-Fi you’ll actually use. Lighting that looks perfect at 10 a.m. can turn flat and gray by 4 p.m. if you’re relying on a window, and [testing at the same time as the real interview](https://career.eoss.asu.edu/blog/2022/08/29/20-video-interview-tips-to-help-you-dazzle-the-hiring-manager-and-get-the job/) catches that before it becomes a surprise.
Record yourself, then play it back and check four things in order:
- Exposure — is your face bright enough to see detail, without looking washed out?
- Color — does your skin tone look natural, or does one side look orange while the other looks blue from mixed bulbs?
- Shadows — is there a dark patch under your eyes, chin, or nose that a fill light could soften?
- Reflections — any glare on glasses, a monitor, or a picture frame behind you?
Small adjustments compound fast. Nudge brightness up a notch, slide a lamp a few inches, swap a warm bulb for one that matches your other light source. Most people need two or three rounds of this before the picture reads as natural rather than adjusted.
One number worth remembering: even a $15 ring light noticeably improved webcam image quality in side-by-side testing, which tells you the fix doesn’t need to be expensive to work.
Your 10-Minute Pre-Interview Lighting Checklist
Run through this list right before you join the call, not the night before.
- Camera at eye level, head and shoulders framed
- Main light source in front of you, not behind
- Fill light added if your face still looks flat on one side
- No bright window or lamp visible in the background
- Glasses checked for glare from a couple of head angles
- Dangly earrings or shiny jewelry removed if they’re catching light oddly
- One to two minute test recording, played back before you commit
| Check | What you’re looking for |
|---|---|
| Camera height | Eye level, not looking up your nose |
| Light direction | In front of your face, never behind |
| Face brightness | Even, no dark patches under eyes or chin |
| Glasses | No white glare covering your eyes |
| Background | No blown-out window or bare bulb visible |
Why Overhead Lights and Mixed Bulbs Wreck Your Video Interview
That ceiling fixture directly above your desk is doing you no favors. Overhead lighting casts shadows straight down your face, deepening the hollows under your eyes and under your chin, the exact opposite of the soft, even look you want. If it’s the only light on when you test your camera, turn it off and rely on a front-facing lamp or window instead.
The other quiet killer is mixed color temperature. A warm incandescent bulb throws an orange tint, while daylight from a window or a cool LED throws a blue one. Run both in the same shot and your face ends up split between two different color casts, sometimes visible as one cheek looking warmer than the other. Mixed color temperatures make skin tone look uneven even when each light looks fine on its own.
The fix costs nothing: pick one light source as your primary and try to match anything else in frame to it. If you’re using a lamp, check the bulb’s packaging for its color temperature rating, measured in kelvin, and buy a second bulb to match if you’re adding a fill light. Daylight bulbs (around 5000 to 6500K) pair well with window light. Warm white bulbs (around 2700 to 3000K) pair better with typical incandescent lamps.
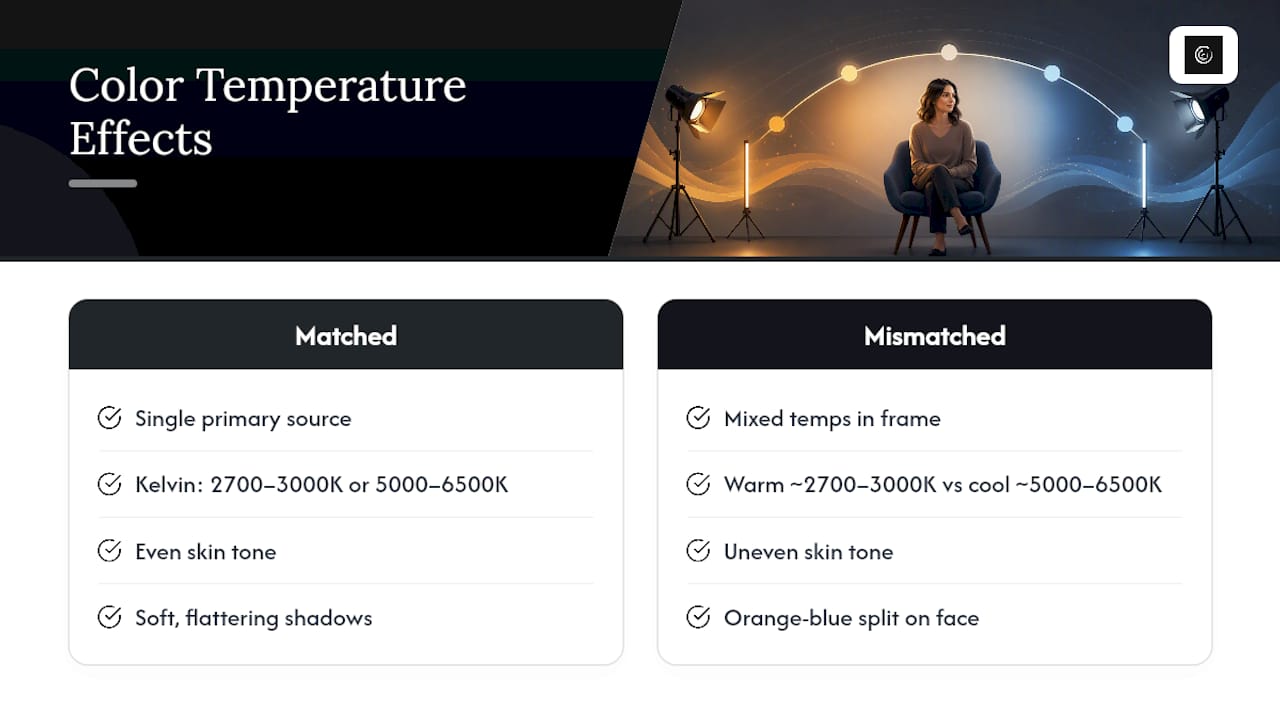
If you can’t avoid a mix entirely, at least keep the mismatched light out of frame or dim enough that it doesn’t compete with your main source. A little inconsistency you can’t see is far better than an obvious orange-blue split across your face.
How Do You Adjust White Balance for Accurate Skin Tones?
Most laptops and webcams try to guess your lighting automatically, and they get it wrong more often than you’d expect, especially under a single lamp or mixed light. The giveaway is simple: if your skin looks distinctly orange, gray, or blue-tinted on your test recording, your white balance is off.
Many webcam apps and video call platforms, including Zoom, offer a manual white balance or “auto white balance” toggle buried in video settings. Turning off the automatic version and setting it manually, or simply changing to a fixed daylight or fluorescent preset that matches your actual light source, often fixes the tint immediately. If your setup doesn’t offer manual control, changing the bulb itself to match your dominant light source solves the same problem from the hardware side.
A quick way to judge it without any special tools: look at the whites of your eyes and your teeth in the test recording. If they look distinctly yellow, orange, or blue rather than a neutral white, your white balance needs adjusting, not your makeup or your camera’s exposure. Fix the light and the color, and the picture usually falls into place on its own.
It’s worth resisting the urge to lean on built-in beauty filters to paper over bad color instead of fixing the light. A feature like automatic portrait smoothing can add a light final touch once your lighting is already accurate, but pushed too far it starts to look artificial, and a hiring manager notices an oddly airbrushed face faster than they notice a slightly warm cast.
Don’t Let Your Background Undo Good Face Lighting
A well-lit face next to a messy, shadowed background still reads as unprofessional, and a background that’s too bright competes with your face for the camera’s attention.
The most common mistake is a bright window or lamp visible behind you in frame. Your webcam’s automatic exposure often prioritizes the brightest object in the shot, which can dim your face down to compensate for a sunlit window over your shoulder. Reposition your chair, close a blind, or angle your camera away from anything glowing behind you.
Shadows on the wall behind you are the second issue. If your key light sits close to a wall behind your chair, you may cast a large, distracting shadow of your head and shoulders onto that wall. Moving your chair a couple of feet away from the wall behind you, rather than adjusting the light itself, usually clears this up in seconds.
Keep the background itself simple and a shade or two darker than your face, so you remain the visual focus. A plain wall, a tidy bookshelf, or a neutral curtain all work. Busy patterns, bright artwork, or a cluttered desk in the frame pull attention away from what you’re actually saying.
Adjusting Your Setup for Different Rooms and Wall Colors
A small home office and a spacious living room behave completely differently under the same lamp, and wall color changes things just as much as square footage.
In a small room, light bounces off walls quickly and fills the space with less effort, so you often need less equipment than you’d think. A single lamp bounced off a nearby white wall can fill a small room evenly. The risk in a small space is overdoing it: too much light too close can wash out detail and flatten your features.
A larger room swallows light fast, especially with high ceilings or dark furniture nearby. You may need your light closer to your face, or a second light source, to get the same brightness a small room delivers with one lamp.
Wall color matters more than most people expect. White or light-colored walls bounce light back toward you, making any lamp go further and giving you softer, more even coverage for free. Dark walls, navy, charcoal, deep green, absorb light instead of reflecting it, which means you’ll need a brighter source or a light positioned closer to your face to get the same result. If your room has dark walls and no easy fix, a plain light-colored poster board or a white sheet pinned up just outside the camera frame can act as an improvised bounce surface.
Softening Harsh Light With a Diffuser or Softbox
A bare lamp or an uncovered ring light produces hard, direct light that creates sharp shadow edges and can exaggerate every skin texture on camera. Softening that light, rather than just aiming it correctly, is the difference between looking lit and looking harsh.
You don’t need a professional softbox to get this effect. A thin white sheet, a sheer curtain, or a piece of parchment paper taped loosely over a lamp’s shade scatters the light before it reaches your face, the same principle behind bouncing light off a wall instead of pointing it directly at yourself. Even a plain piece of printer paper held a few inches in front of a small lamp softens its edge noticeably.
If you do want to buy something purpose-built, small clip-on diffusers and collapsible mini softboxes for desk lamps run cheap and pack flat when you’re not using them. They’re worth it if you plan to do a lot of video interviews or ongoing remote work on camera, less so for a single upcoming call.
The tell that you need more diffusion: look at the shadow your nose casts on your cheek in a test recording. A hard, sharply defined edge means your light source is too direct. A soft, gradual shadow with no clear edge means it’s properly diffused. Move the light farther away, add a layer of diffusion material, or bounce it off a wall until that shadow edge disappears.
Iteration’s Perspective: Lighting Is a Delivery Signal, Not Just a Look
Recorded interview answers get judged on more than word choice. A shadowed, poorly framed face reads as unprepared before you say a single word, and that first impression colors how the rest of your answer lands. Lighting isn’t vanity here, it’s part of how confidence and clarity actually get transmitted through a camera.
That’s why practicing on camera, under the same lighting you’ll use for the real interview, matters more than most job seekers assume. Recording a full answer and reviewing it with Iteration’s ranked practice rounds shows you exactly how lighting, framing, and delivery combine, not just whether your answer hit the right points.
— Iteration
Test Your New Lighting Setup With a Real Practice Round
Once your lighting looks right in a test recording, the next question is whether your actual answers hold up under it. A well-lit face still needs a strong, structured response behind it, and the only way to know if yours lands is to record one and see what an outside read catches that you missed.

Iteration gives you that outside read without waiting for a real interview to find out where you stand. Upload or record a practice answer under your new setup, and Iteration’s AI grading breaks down your response with structured feedback, not just a vague “good job” or “needs work.” You’ll see specifically which parts of your answer were strong, which fell flat, and get targeted drills built around your weaker responses instead of generic tips everyone else gets too.
Run one recorded practice round using the lighting checklist above, then head to the trial page and paste in your answer or upload the recording. Compare the feedback against how the video actually looked. That single pass tells you more about your on-camera readiness than another article ever will.
Sources
- Video conference lighting — OBSBOT blog
- 20 video interview tips to help you dazzle the hiring manager and get the job — ASU Career
- I bought a $15 ring light to use with my webcam — PCWorld